
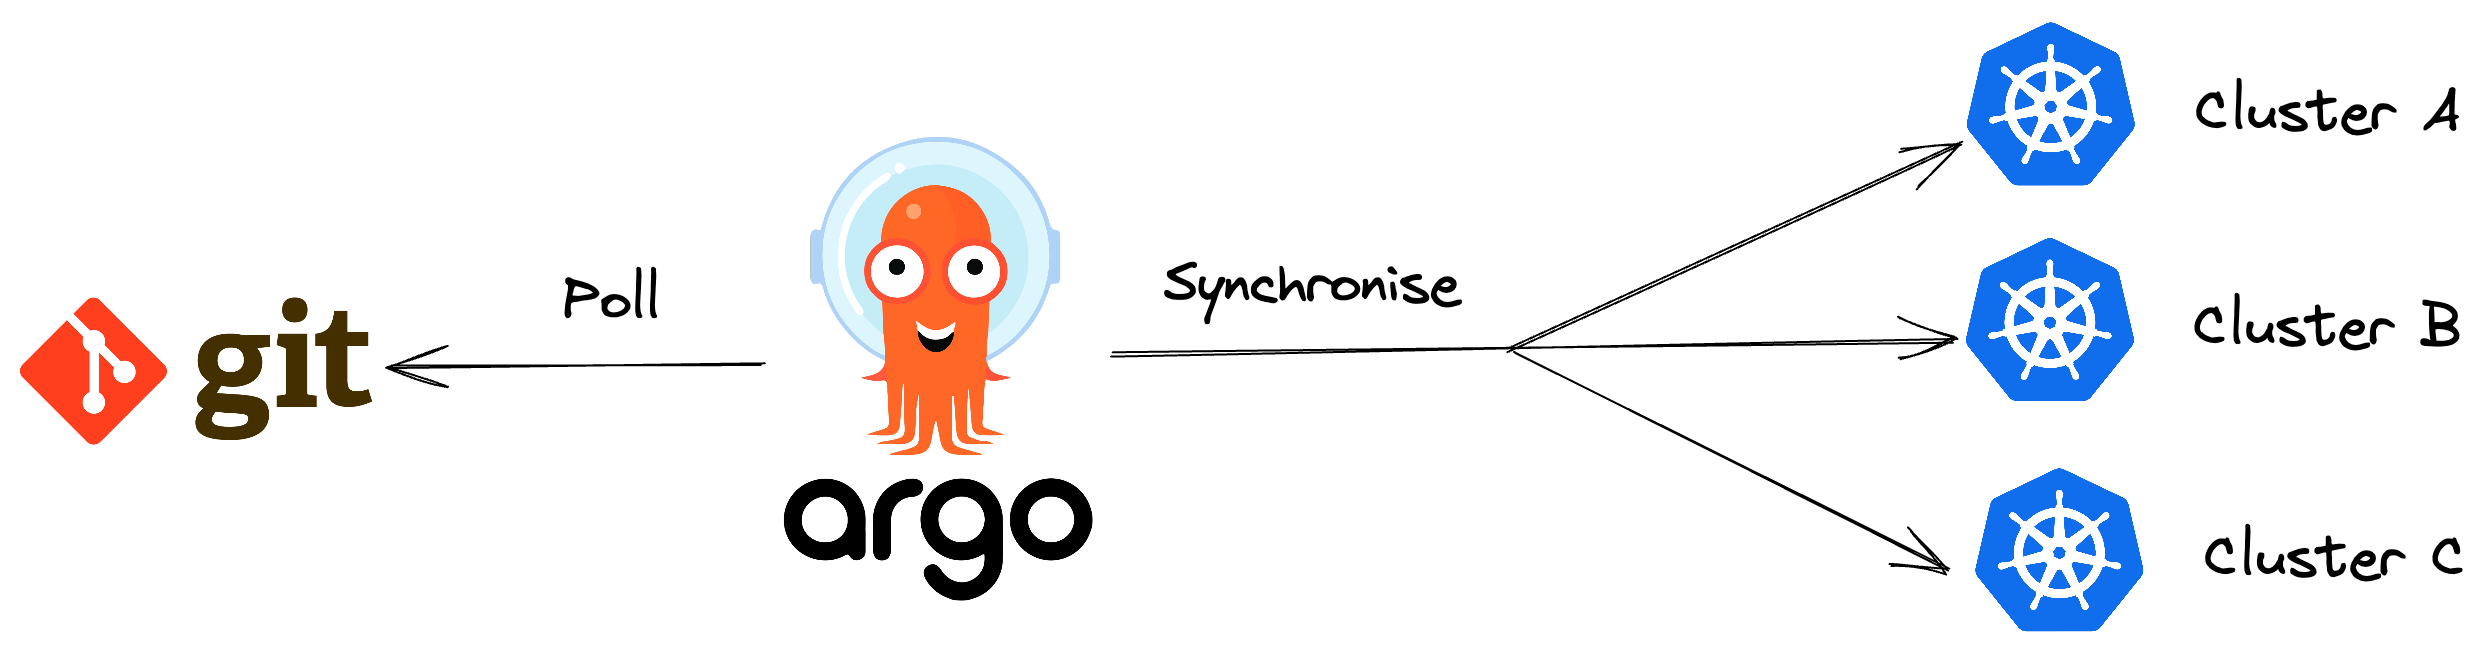
ArgoCD는 GitOps를 구현하기 위한 도구 중 하나로 쿠버네티스를 위한 CD 툴이라고 할 수 있습니다.
Git Repository의 특정 브랜치, 태그에 대한 업데이트를 추적하여 Manifest 파일의 변경사항을 감시하게 됩니다.
동기화(Sync)를 통해 현재 배포된 환경의 상태와 Manifest 파일에 정의된 상태를 동일하게 유지하는 역할을 수행합니다.
오늘은 ArgoCD를 설치하고, 간단한 애플리케이션 버전 업데이트를 해보겠습니다.
1. ArgoCD 설치
argocd Namespace를 생성하고, github argocd repository에 있는 install.yaml을 통해 설치할 수 있습니다.
kubectl create namespace argocd
kubectl apply -n argocd -f https://raw.githubusercontent.com/argoproj/argo-cd/stable/manifests/install.yaml터미널에서 argocd를 사용할 수 있게 ArgoCD CLI를 다운로드합니다. 저는 EC2 Instance를 사용하고 있기 때문에 Linux용으로 다운로드합니다. 다음 링크를 통해 Mac이나 Windows에서의 설치 방법을 알 수 있습니다.
https://argo-cd.readthedocs.io/en/stable/cli_installation/
Installation - Argo CD - Declarative GitOps CD for Kubernetes
Installation You can download the latest Argo CD version from the latest release page of this repository, which will include the argocd CLI. Linux and WSL ArchLinux Homebrew Download With Curl Download latest version curl -sSL -o argocd-linux-amd64 https:/
argo-cd.readthedocs.io
curl -sSL -o argocd-linux-amd64 https://github.com/argoproj/argo-cd/releases/latest/download/argocd-linux-amd64
sudo install -m 555 argocd-linux-amd64 /usr/local/bin/argocd
rm argocd-linux-amd64이제 ArgoCD 웹 콘솔에 접속할 수 있도록 설정합니다. Ingress 같은 방법들이 있지만 저는 port-forward를 사용합니다.
[ec2-user@ip-10-0-11-234 ~]$ kubectl port-forward svc/argocd-server -n argocd 8080:443
Forwarding from 127.0.0.1:8080 -> 8080
Forwarding from [::1]:8080 -> 8080EC2 Instance를 주소로 하여 접속해도 되겠지만 저는 localhost로 접속하고 싶기 때문에 SSH 로컬 포트포워딩을 사용하겠습니다. 새로운 터미널 창을 띄워 ssh 명령어를 입력합니다.
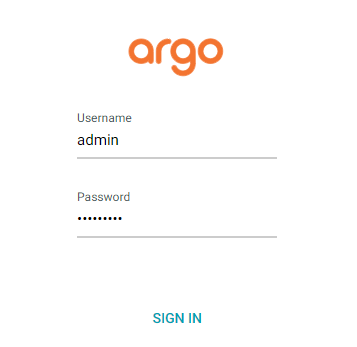
ssh -L 8080:127.0.0.1:8080 ec2-user@(EC2 Instance 주소) -i (키페어)이제 localhost:8080에 접속하면 argocd 로그인 창이 나오게 됩니다.

웹 콘솔 로그인 전 CLI부터 로그인합니다. 다음 명령어를 통해 비밀번호를 발급받습니다. 2가지 방법 중 하나를 선택하면 됩니다.
argocd admin initial-password -n argocd
# or
kubectl -n argocd get secret argocd-initial-admin-secret -o jsonpath="{.data.password}" | base64 -dargocd login을 통해 CLI 로그인이 가능합니다. Username으로 admin을 입력하고 Password에 발급받은 비밀번호를 입력합니다.
[ec2-user@ip-10-0-11-234 ~]$ argocd login --insecure 127.0.0.1:8080
Username: admin
Password:
'admin:login' logged in successfully
Context '127.0.0.1:8080' updated
[ec2-user@ip-10-0-11-234 ~]$원활한 웹 콘솔 접속을 위해 비밀번호를 바꿔주겠습니다.
[ec2-user@ip-10-0-11-234 ~]$ argocd account update-password
*** Enter password of currently logged in user (admin):
*** Enter new password for user admin:
*** Confirm new password for user admin:
Password updated
Context '127.0.0.1:8080' updated
[ec2-user@ip-10-0-11-234 ~]$이제 웹 콘솔에서도 Username으로 admin, Password로 업데이트한 비밀번호를 입력하면 로그인이 됩니다.
2. 애플리케이션 생성
Manifest 파일들을 관리할 CodeCommit Repository부터 생성하겠습니다. 이름은 demo-repo로 합니다.

사용자의 컴퓨터에서 CodeCommit을 접근할 수 있는 AWS Credential을 가진 뒤 (예 : AWSCodeCommitPowerUser) Git Repository를 Clone합니다.
git clone https://git-codecommit.ap-northeast-2.amazonaws.com/v1/repos/demo-repoRepository 디렉토리 안에 deployment.yaml 파일을 생성합니다. image는 nginx를 사용합니다.
apiVersion: apps/v1
kind: Deployment
metadata:
  name: demo
spec:
  replicas: 2
  selector:
    matchLabels:
      app: demo
  template:
    metadata:
      labels:
        app: demo
    spec:
      nodeSelector:
        node: app
      tolerations:
      - key: node
        operator: Equal
        value: app
        effect: NoSchedule
      containers:
      - name: nginx
        image: nginx:1.14.2
        ports:
- containerPort: 80commit 후 CodeCommit으로 push합니다.
git add .
git commit -m "first commit"
git branch -M main
git push origin main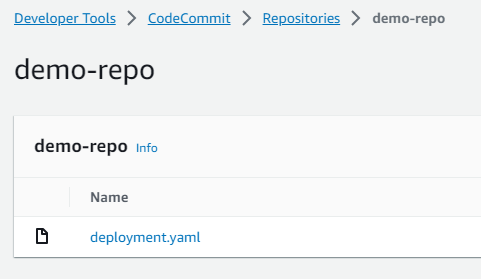
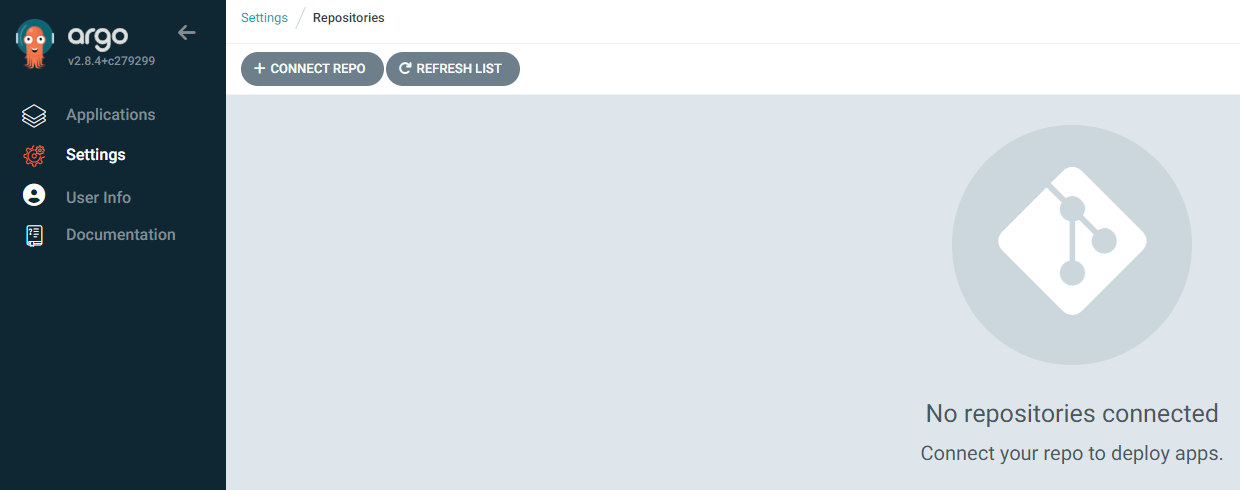
이제 argocd에 CodeCommit Repository를 등록하겠습니다. 웹 콘솔에서 Settings > Repositories 메뉴를 클릭하고 CONNECT REPO를 클릭합니다.
connection method는 HTTPS를 선택하고, Repository URL에 CodeCommit URL을 입력합니다. 반드시 Username과 Password에는 IAM User를 통해 발급한 HTTPS Git credentials 정보를 입력해야 합니다. CONNECT를 눌러 등록합니다.

다음과 같이 Successful이라고 뜨면 성공적으로 연결된 것입니다.

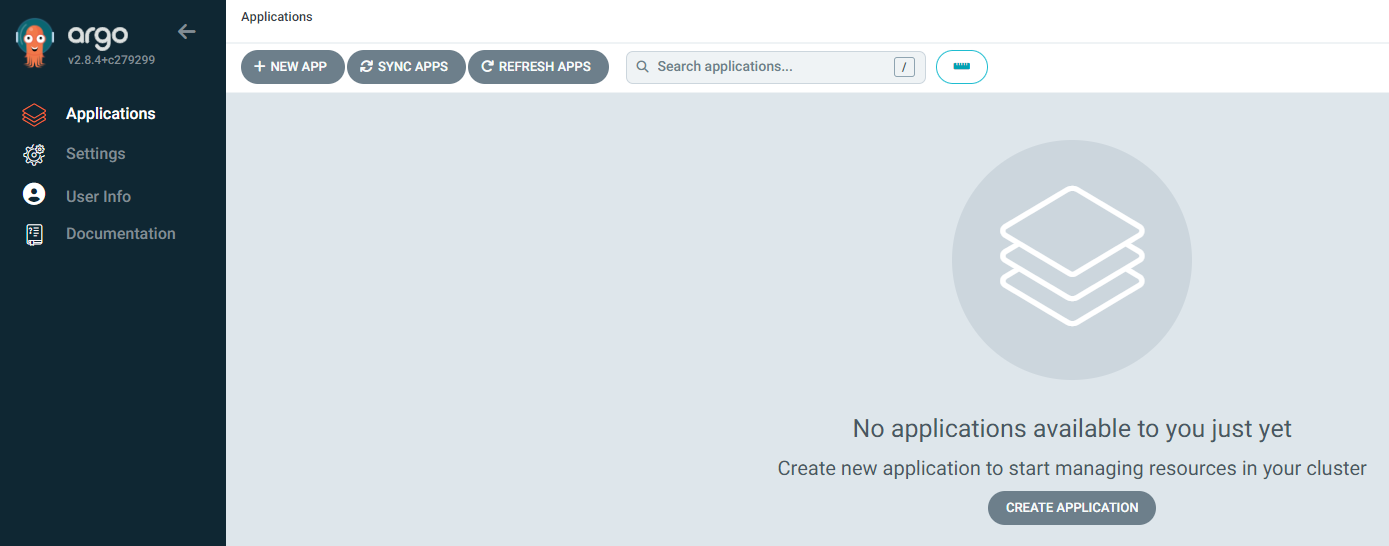
이제 마지막으로 애플리케이션을 생성해봅시다. Applications > NEW APP을 누릅니다.
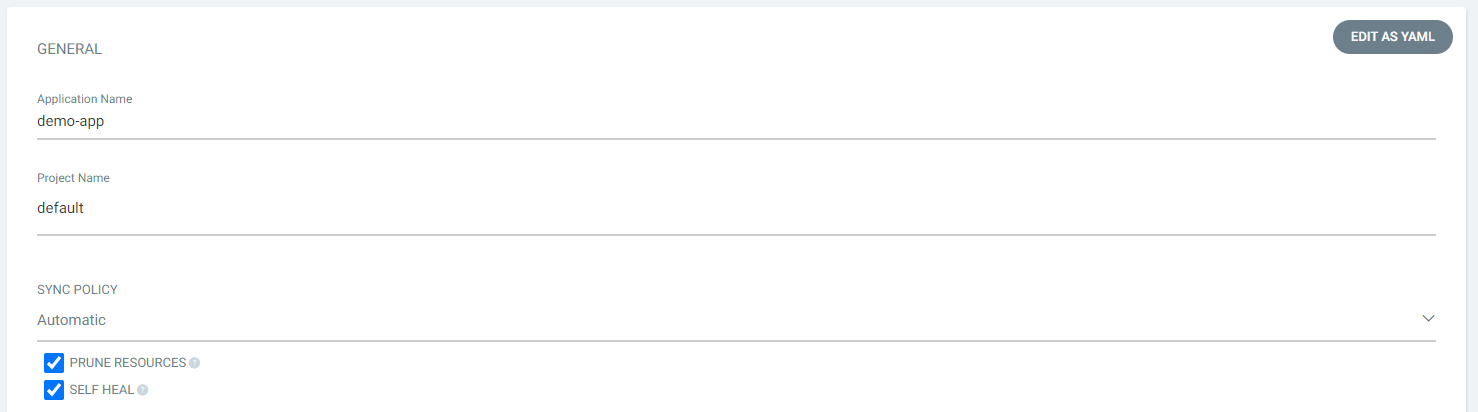
GENERAL에선 Application Name을 지정하고, Project Name은 default를 지정합니다. SYNC POLICY는 ArgoCD가 주기적으로 Git Repository의 변경사항을 확인하여 변경된 부분을 적용하는 Automatic을 선택합니다.
Manifest 파일에 없는 리소스를 삭제하기 위해 PRUNE RESOURCES를 체크하고, 쿠버네티스 운영환경과 Manifest 파일에 명시된 정보가 일치하게 하기 위해 SELF HEAL 옵션을 체크합니다.
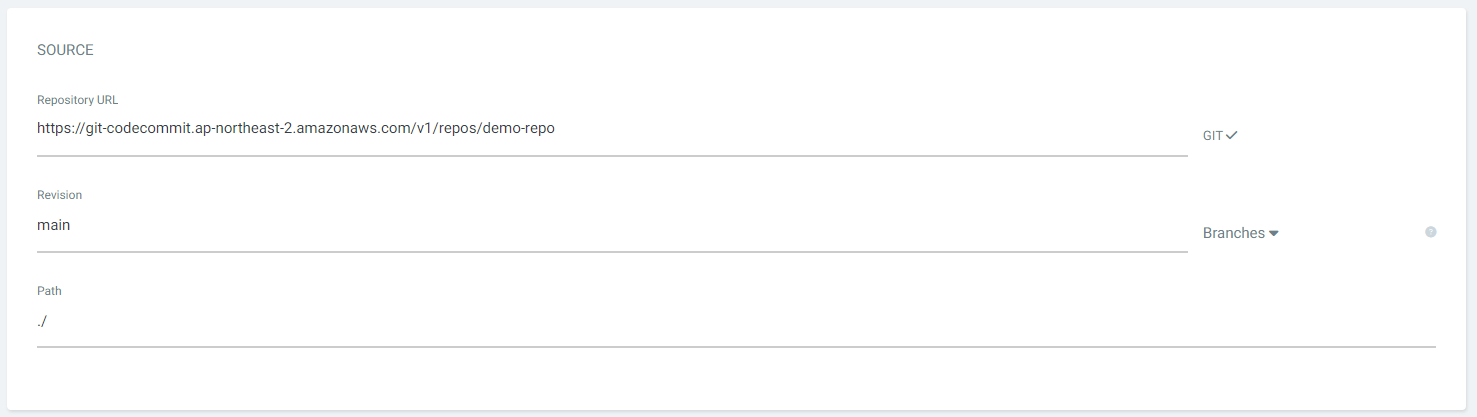
SOURCE에선 아까 지정한 Repository URL을 선택합니다. Revision에서 Branches를 선택한 뒤 push된 branch 이름을 입력합니다. Path로 ./(root)를 지정합니다.
DESTINATION에서 Cluster URL(kubernetes.default.svc)을 선택하고, 배포할 Namespace로 default를 지정합니다.
이제 CREATE를 눌러 Application을 생성합니다.

배포가 완료되어 Status에서 Healthy, Synced라고 뜹니다.
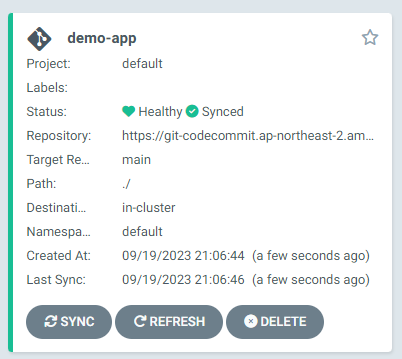
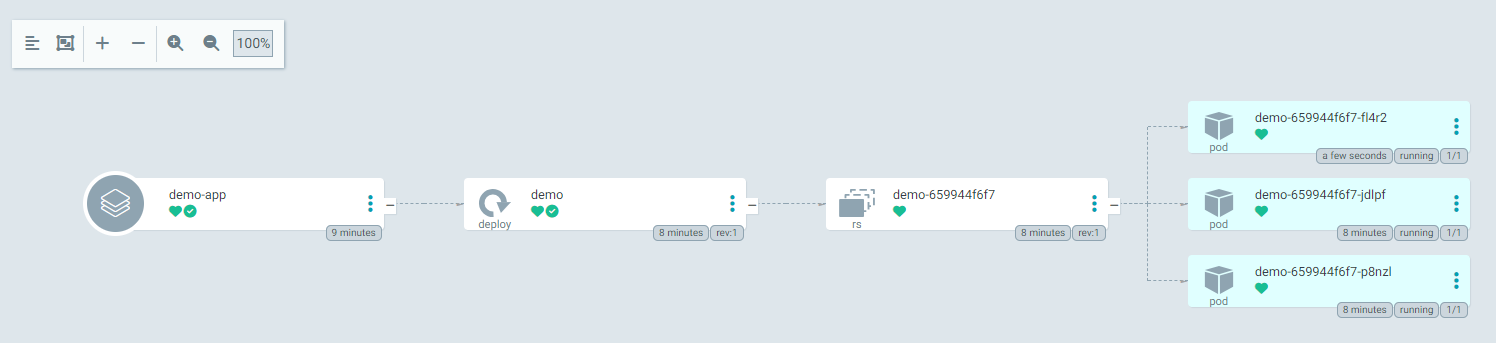
Application을 클릭하면 Manifest에 명시되고 배포된 리소스들이 UI로 보입니다.

3. 애플리케이션 설정 변경
첫 번째로, yaml 파일에서 replicas를 3으로 늘리고 commit & push 하겠습니다.
...
spec:
  replicas: 3
...argocd가 자동으로 변경 사항을 감지하고, replicas를 3으로 늘렸습니다.
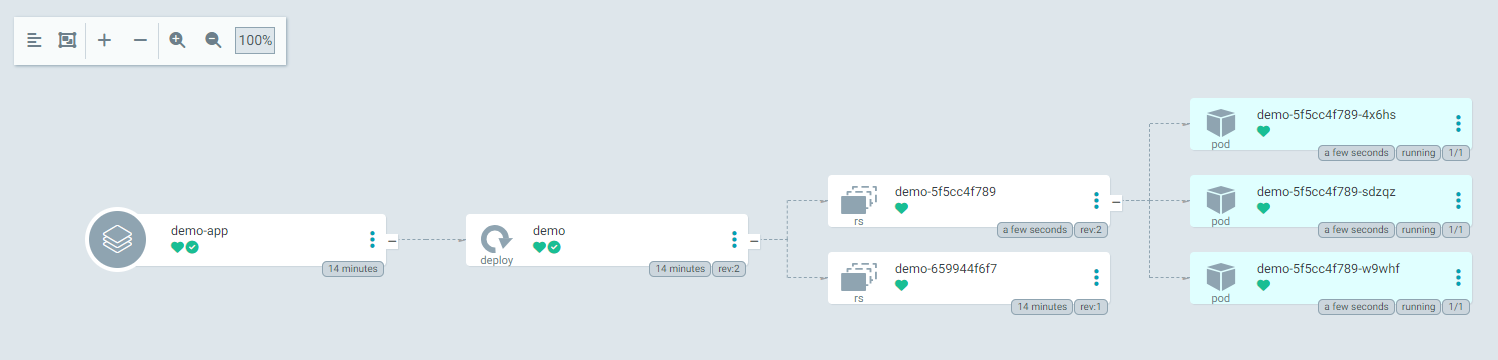
두 번째로, yaml 파일에서 image를 httpd로 설정하고 commit & push 하겠습니다.
...
      containers:
      - name: httpd
        image: httpd:2.4
...argocd가 자동으로 변경 사항을 감지하고, 기존과 다른 image를 사용했기 때문에 새로운 ReplicaSet을 생성했습니다.
오늘의 글은 여기까지입니다. 감사합니다!
참고
https://wlsdn3004.tistory.com/37
ArgoCD란? 개념부터 설치 배포까지
ArgoCD란? 기존의 소프트웨어를 배포하고 관리하는 방식은 문제점이 많았다. 인프라 환경을 수동적으로 관리하고, 소프트웨어와 인프라를 따로 관리하는 경우가 많았기에 이로 인해 인프라와 소
wlsdn3004.tistory.com
ArgoCD란? ArgoCD 개요 및 설치
GitOps GitOps는 DevOps의 실천 방법 중 하나로, 애플리케이션의 배포와 운영에 관련된 모든 요소들을 Git에서 관리(Operation) 한다는 뜻이다. GitOps는 Git Pull 요청을 사용하여 인프라 프로비저닝 및 배포
nayoungs.tistory.com
https://coffeewhale.com/kubernetes/gitops/argocd/2020/02/10/gitops-argocd/
GitOps와 ArgoCD
오늘은 GitOps가 무엇인가에 대해서 알아보고 그 구현체인 ArgoCD에 대해서 살펴보는 시간을 가져보겠습니다.
coffeewhale.com
'AWS' 카테고리의 다른 글
| [AWS] aws-nuke로 모든 리소스 삭제 (0) | 2023.09.24 |
|---|---|
| [AWS] EKS Node Metadata (IMDS) - EC2 (1) | 2023.09.22 |
| [AWS] EKS AutoScaling - HPA, Cluster Autoscaler (2) | 2023.09.18 |
| [AWS] EKS Fargate로 Pod 배포와 로깅 (0) | 2023.09.16 |
| [AWS] CodePipeline을 통한 React CI / CD (2) | 2023.09.15 |